
Setup conversions in Google ads
Over my time I have looked at Google ads and how to properly setup Conversion tracking.
There are many ways to set this up, for different scenarios.
Prerequisites
- GTM (Google Tag Manager)
- GA4 ID (starts with G – or GT – )
- Google Ads ID (start with AW – )
- Conversion Linker
- mailto: & tel: click container
- ecommerce container
- GA4 (Google Analytics 4)
- Go to GA4 → Admin → Data Streams → Your stream → Enhanced Measurement
Toggle on “Form interactions”
This tracks form_start and form_submit events automatically
- Go to GA4 → Admin → Data Streams → Your stream → Enhanced Measurement
- Google Ads
- Primary Goals
- contact tel: click
- contact mailto: click
- contact lead generation : (form submision)
- purchase if selling
- Primary Goals
In Google Ads, click on Tools and Settings > Measurement > conversions
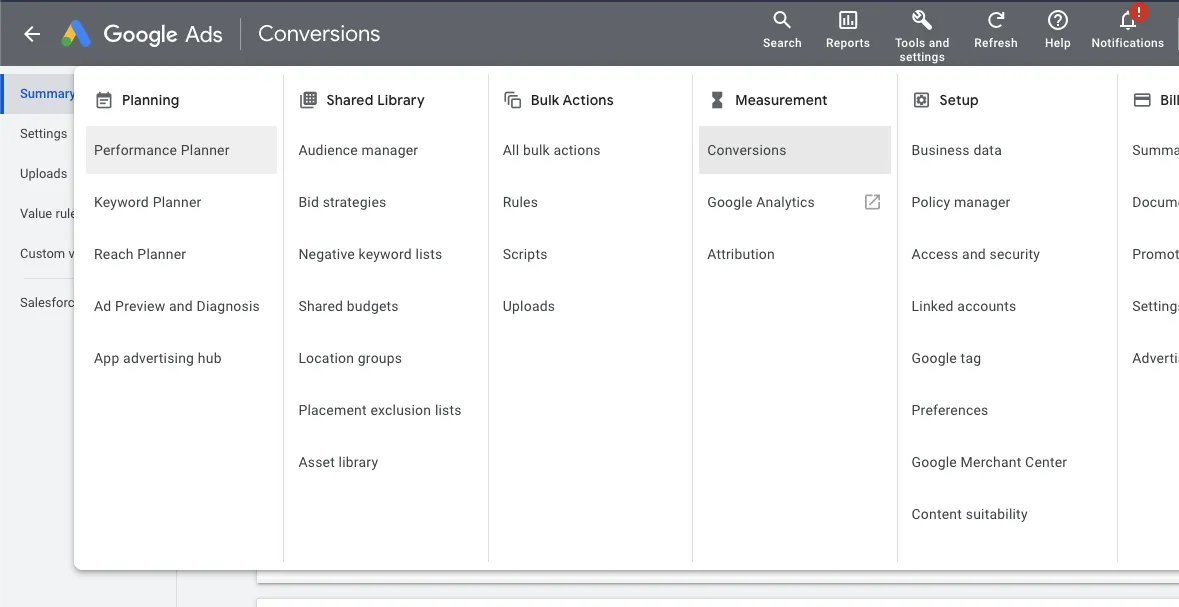
Click on new conversion action
Select the kind of conversions that you want to track
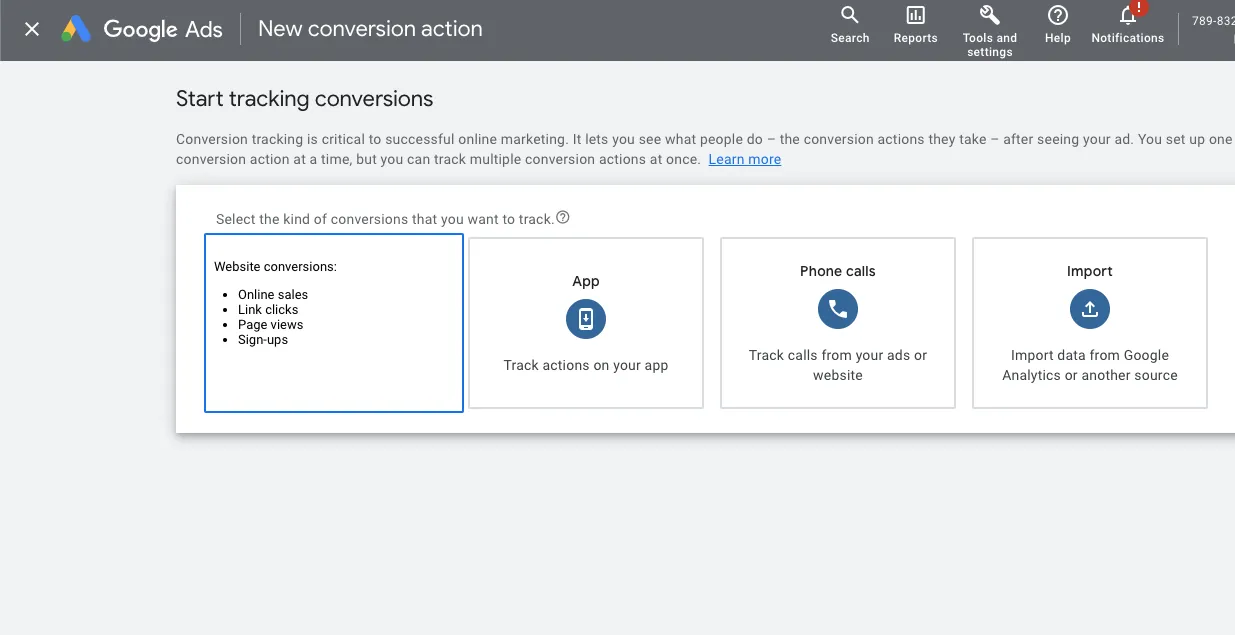
- Select Website
Enter the URL for the website where you want to measure your conversions.
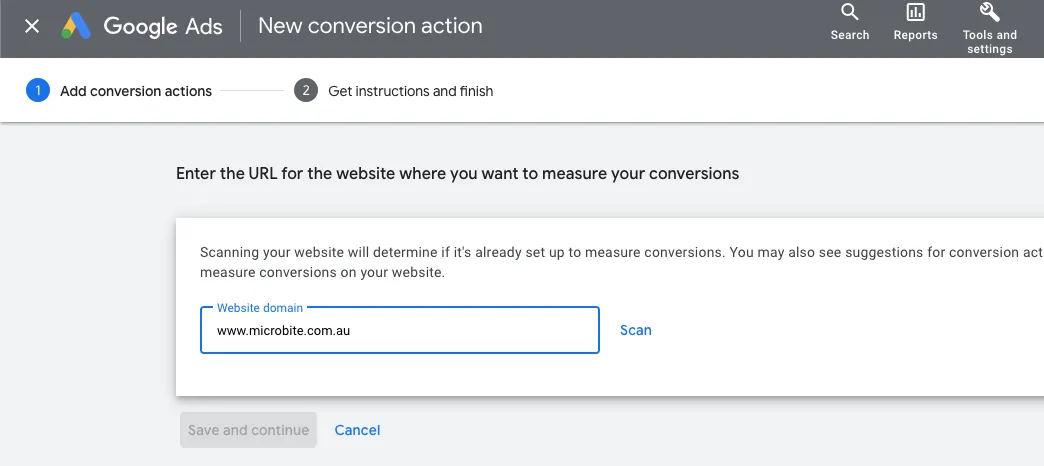
- Type in your url
Create conversion actions manually using code
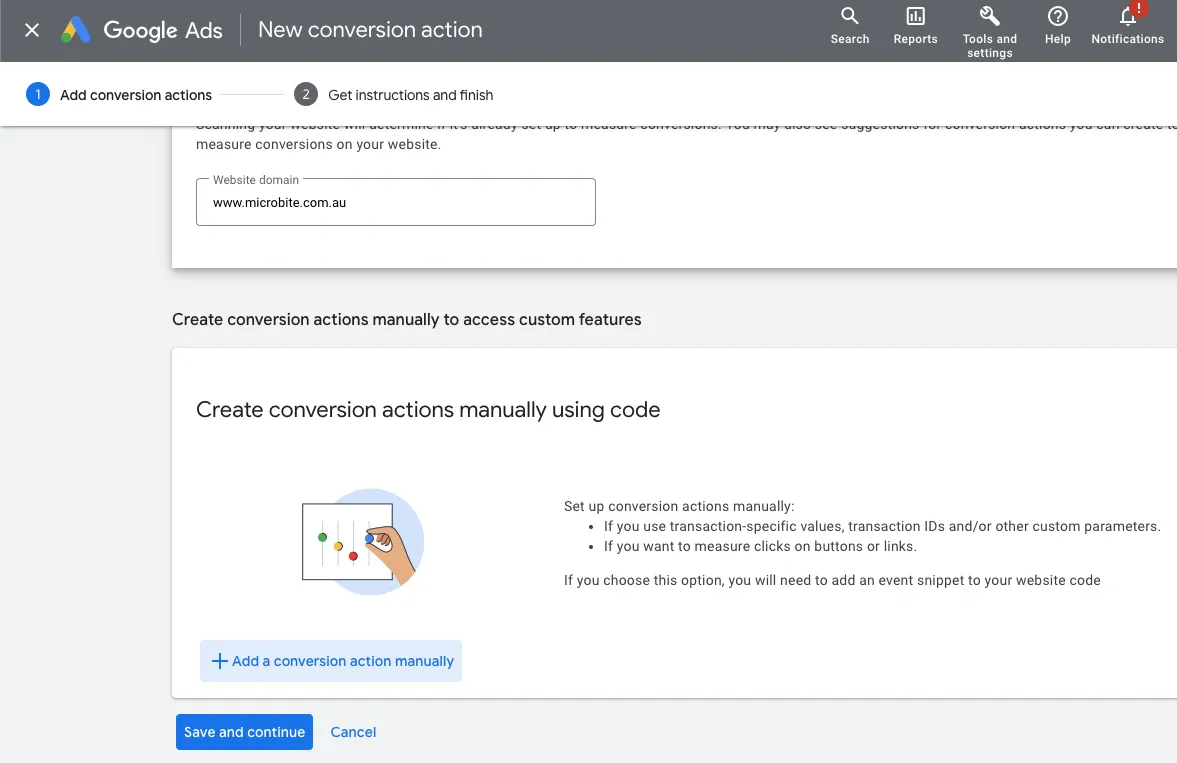
- Click > Add a conversion action manually
Conversion action details
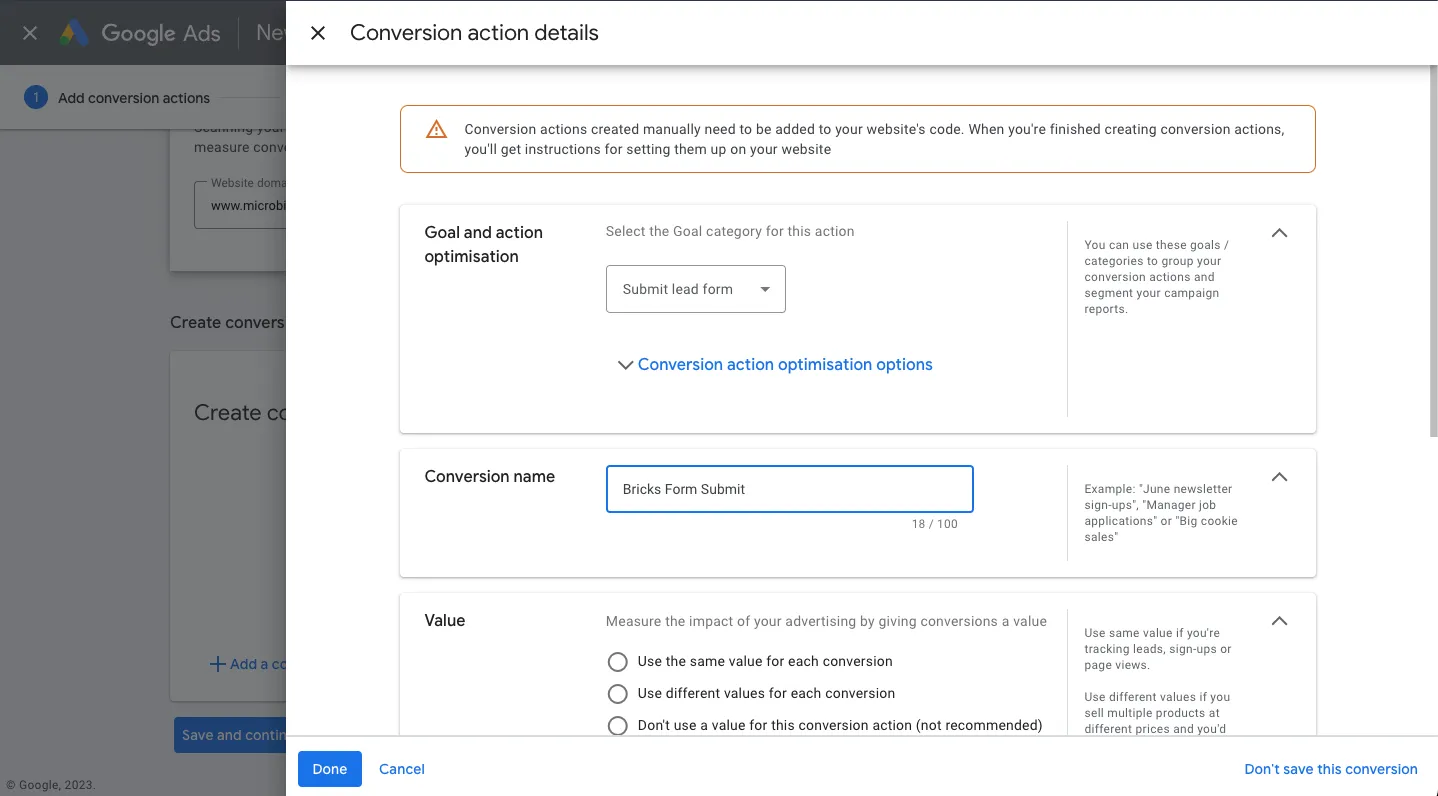
- Goal and action optimisation > Select Category > Submit lead form
- Conversion name > Enter a conversion name> Bricks Form Submit
OR
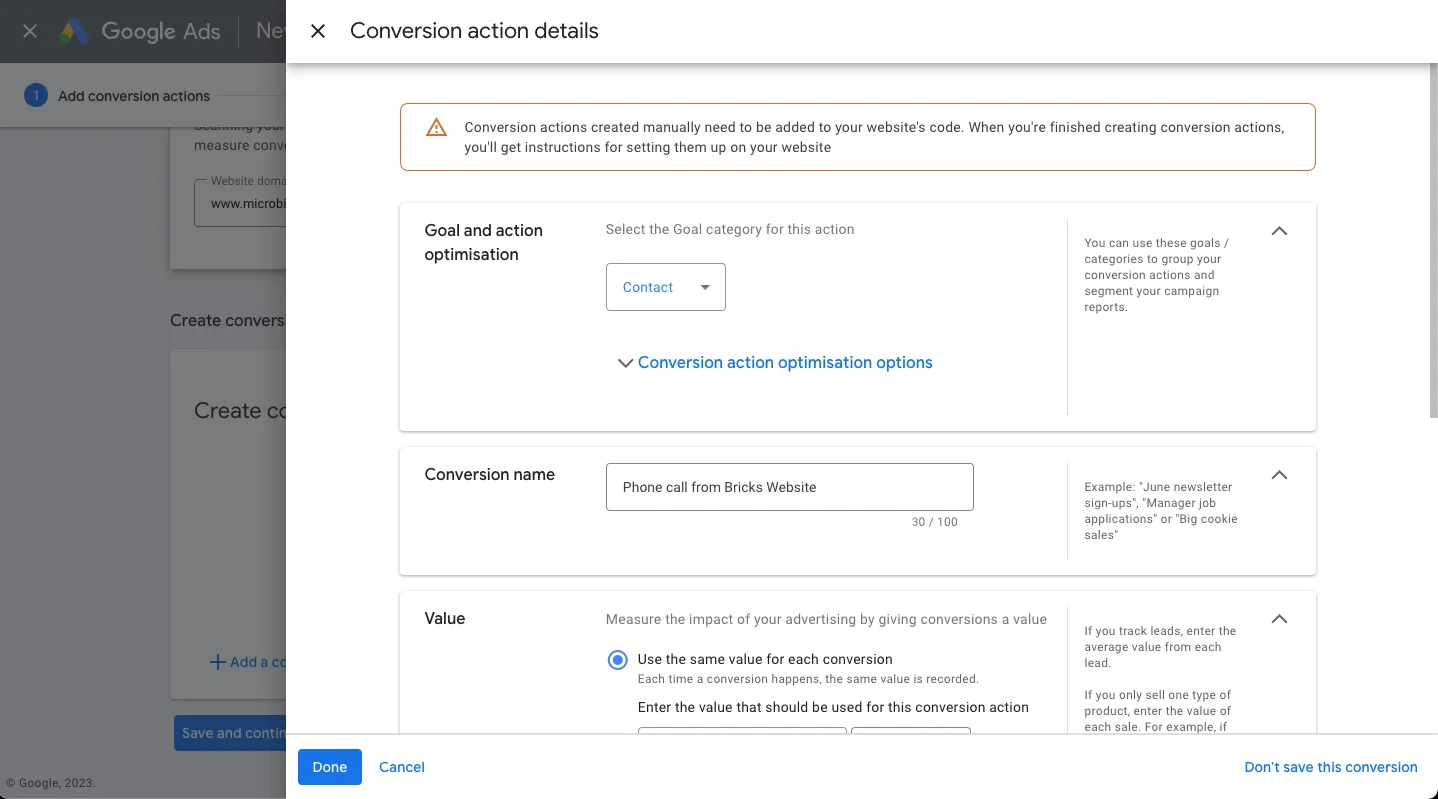
- Goal and action optimisation > Select Category > Contact
- Conversion name > Enter a conversion name> Phone call from Bricks Website
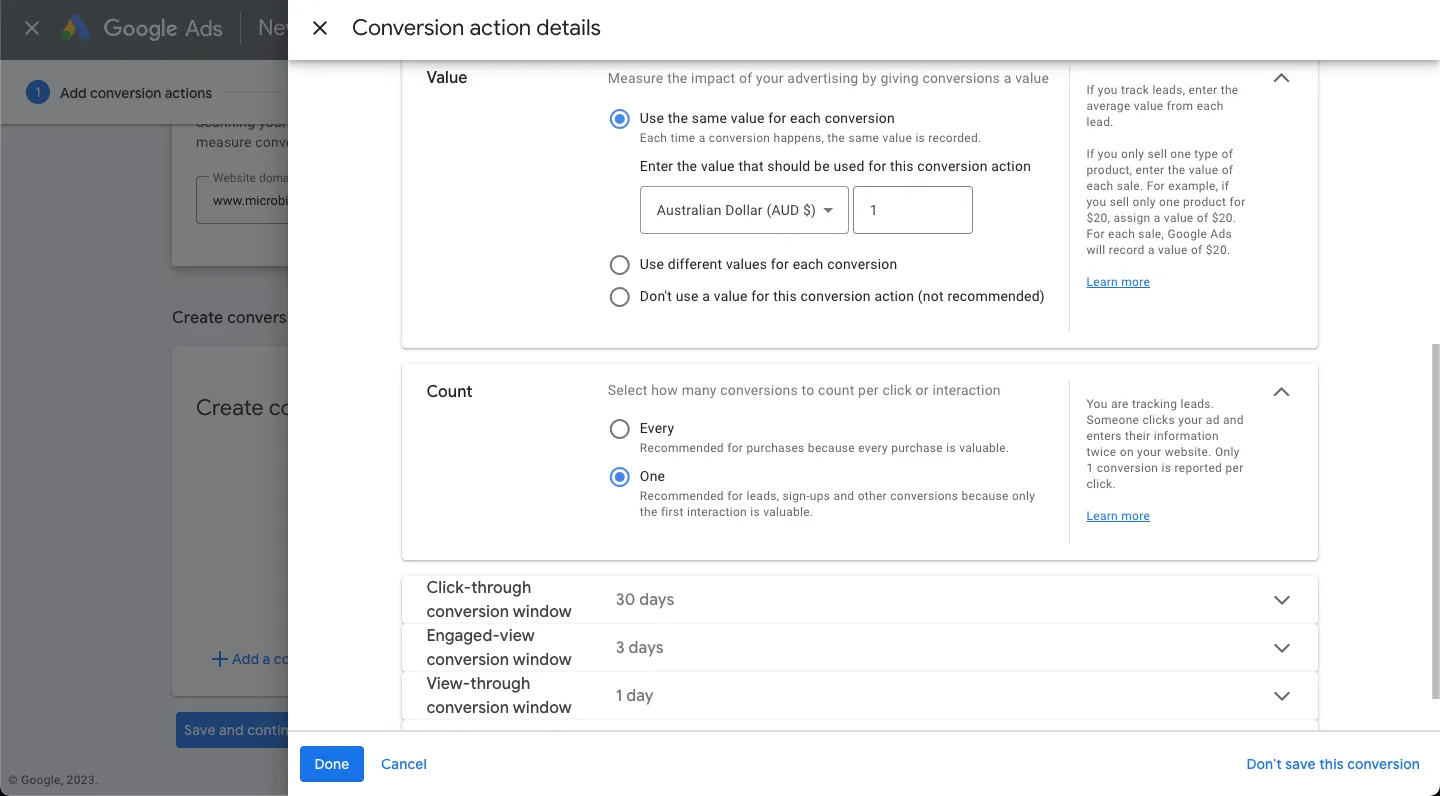
- Value > Use the same value for each conversion > Eg $1
- Count > One (as it will be usually 1 per customer)
- Click > Done
Save and continue

- Click > Save and continue
Save and continue
- Click > Save and continue
Get instructions and finish
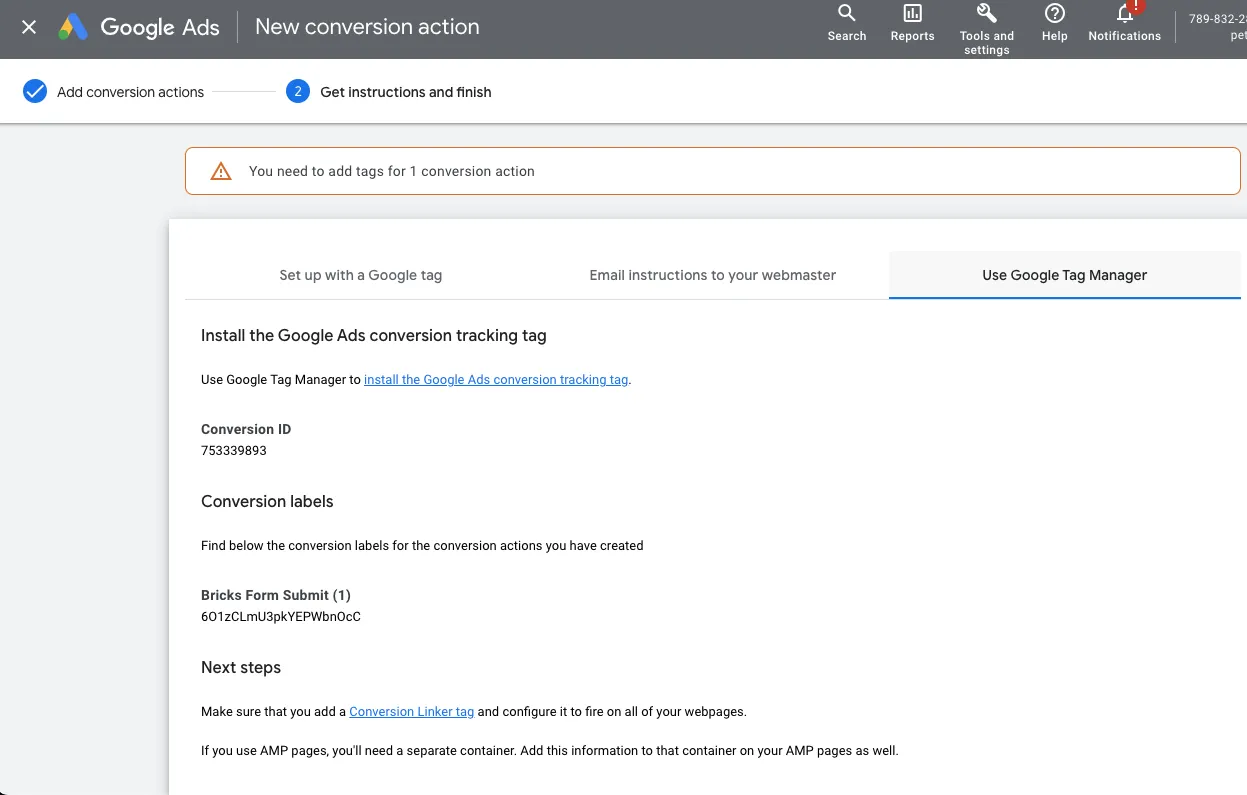
- Click on the tab > Use Google Tag Manger
- Copy the Conversion ID and Conversion Labels for Google Tag Manager
Unverified Conversions
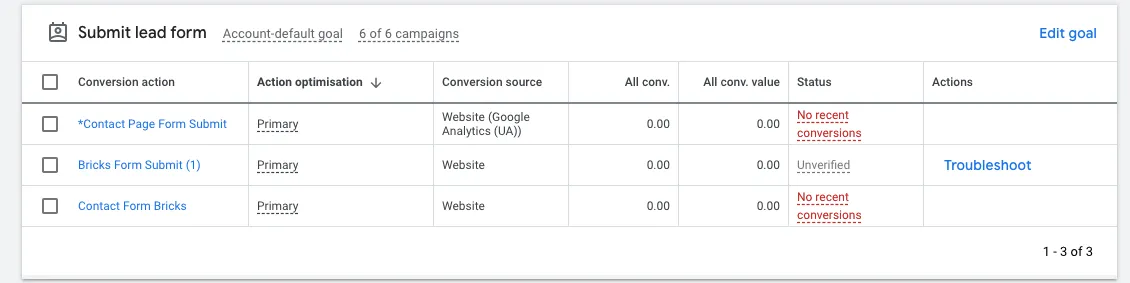
- Conversions will be unverified until Google Tag Manager is setup
- It is important to disable ad blockers or private browsers as they will interfere with the transmission of data.
- Once Conversions are verified they will turn to No recent Conversions
Setup GTM for Google Ads Conversions
Setup Tag > Google Analytics: GA4 Configuration
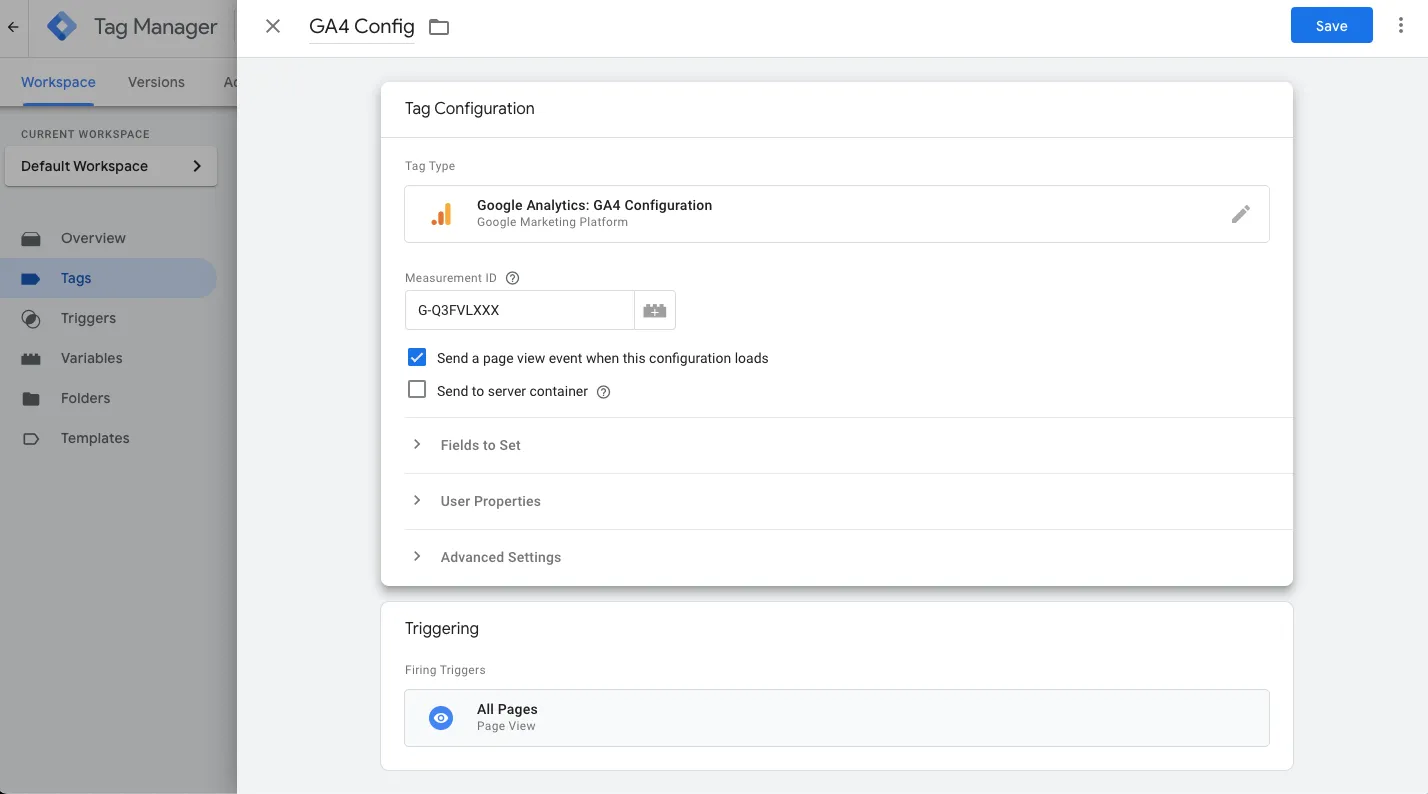
- Click on side column Tags > New
- Name the tag > GA4 Config
- Under Tag Configuration > Tag Type > Google Analytics: GA4 Configuration
- Under Measurement ID > Enter the Measurement ID (e.g, G-A2ABC2ABCD) for your GA4 property
- Tick > Send a page view event when this configuration loads
- Under Triggering > Firing Triggers > All Pages
- Click > Save
Set up Tag > Conversion Linker
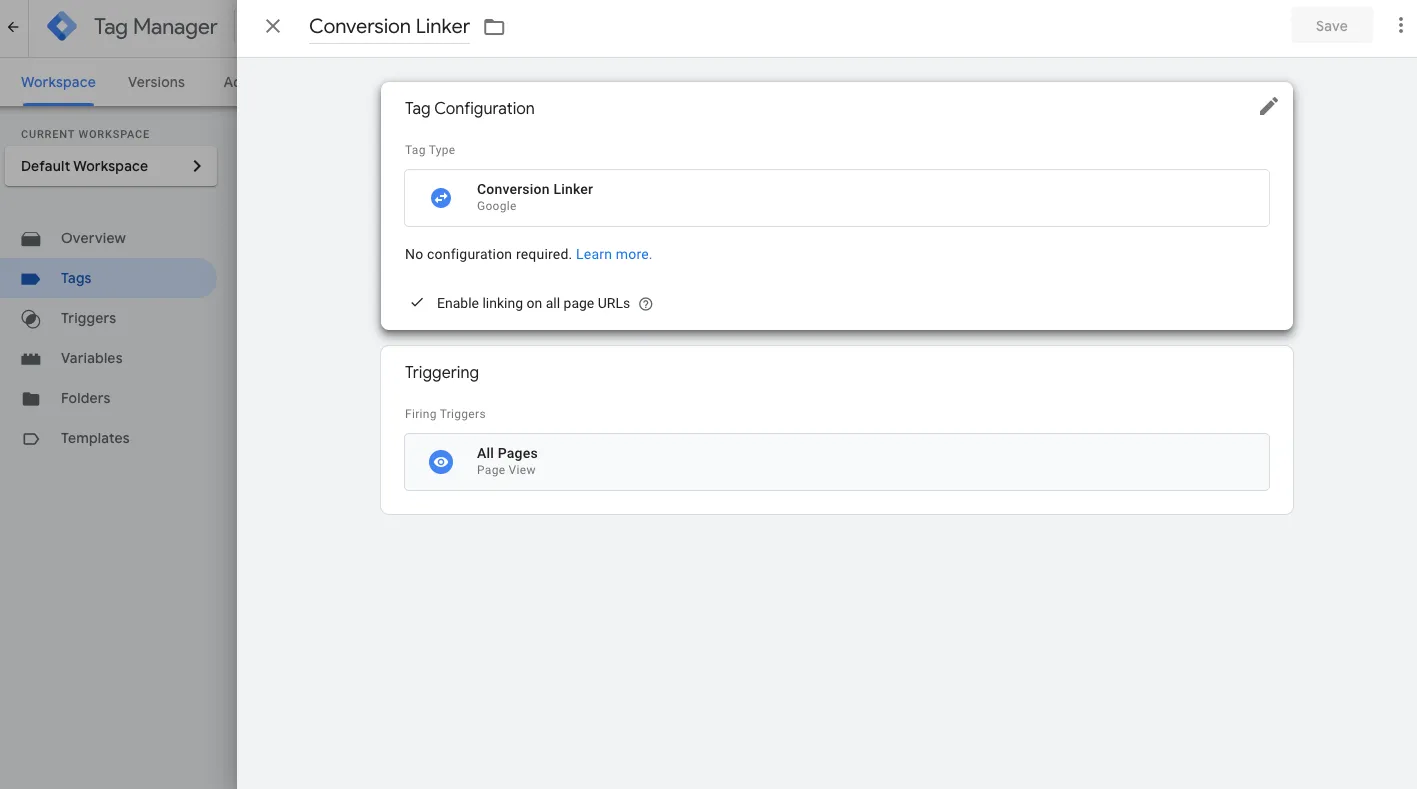
- Click on side column Tags > New
- Name the tag > Conversion Linker
- Under Tag Configuration > Tag Type > Conversion Linker
- Under Linker Options > tick > Enable linking on all page URLs
- Under Triggering > Firing Triggers > All Pages
- Click > Save
Set up Tag > Bricks Form Submit
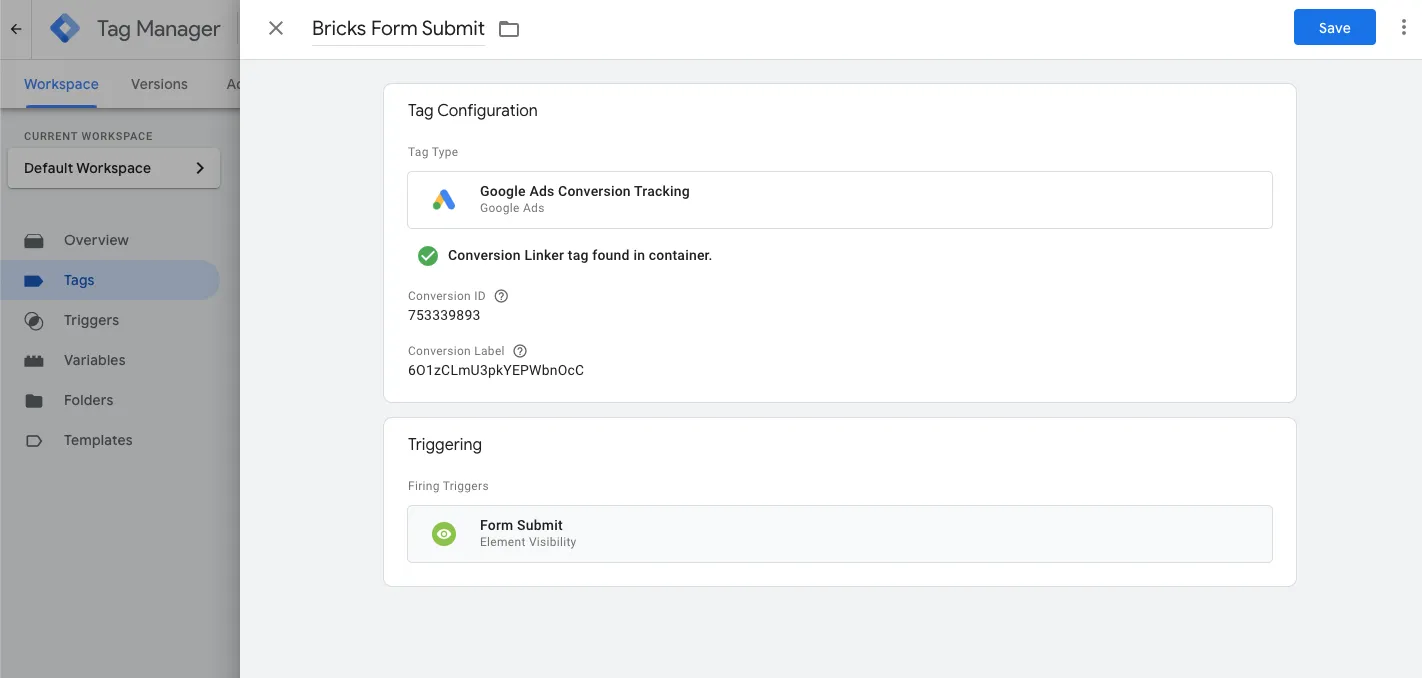
- Click on side column Tags > New
- Name the tag > Bricks Form Submit
- Under Tag Configuration > Tag Type > Google Ads Conversion Tracking
- Enter Conversion ID from Google Ads such as in step 9
- Enter Conversion Label from Google Ads such as in step 9
- In-depth view of configuration
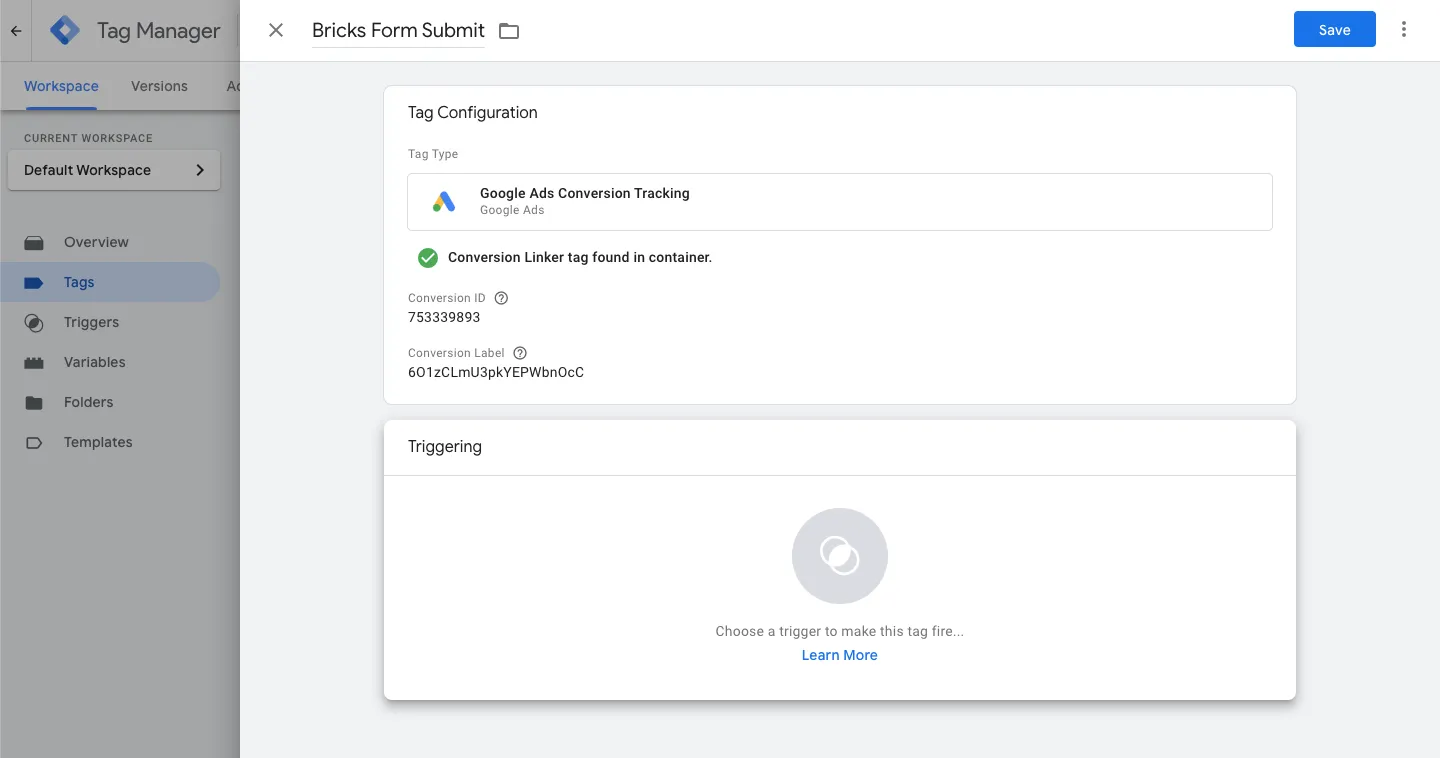
- Click on panel > Triggering
- Click on + > To add a new trigger
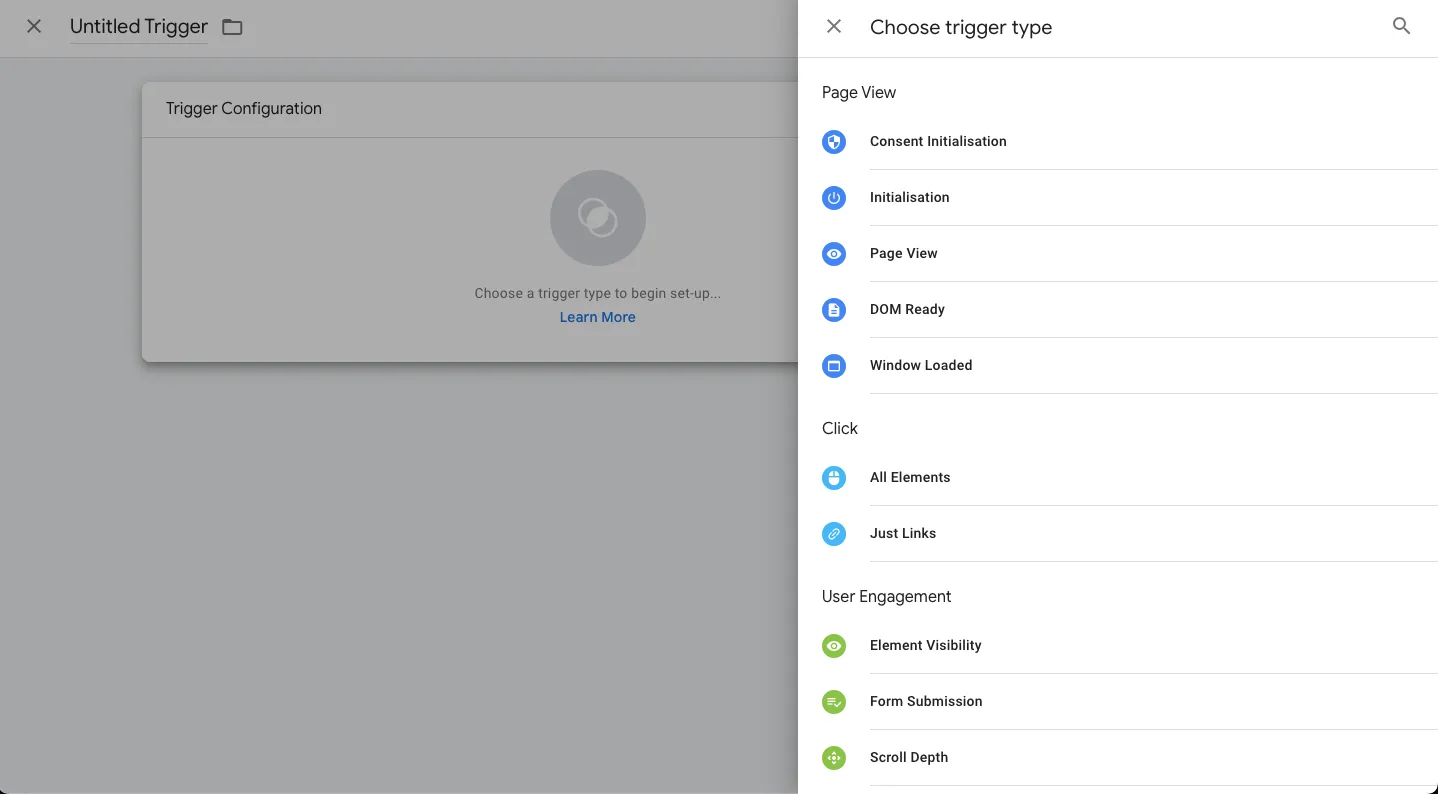
- Choose trigger Type > Element Visibility
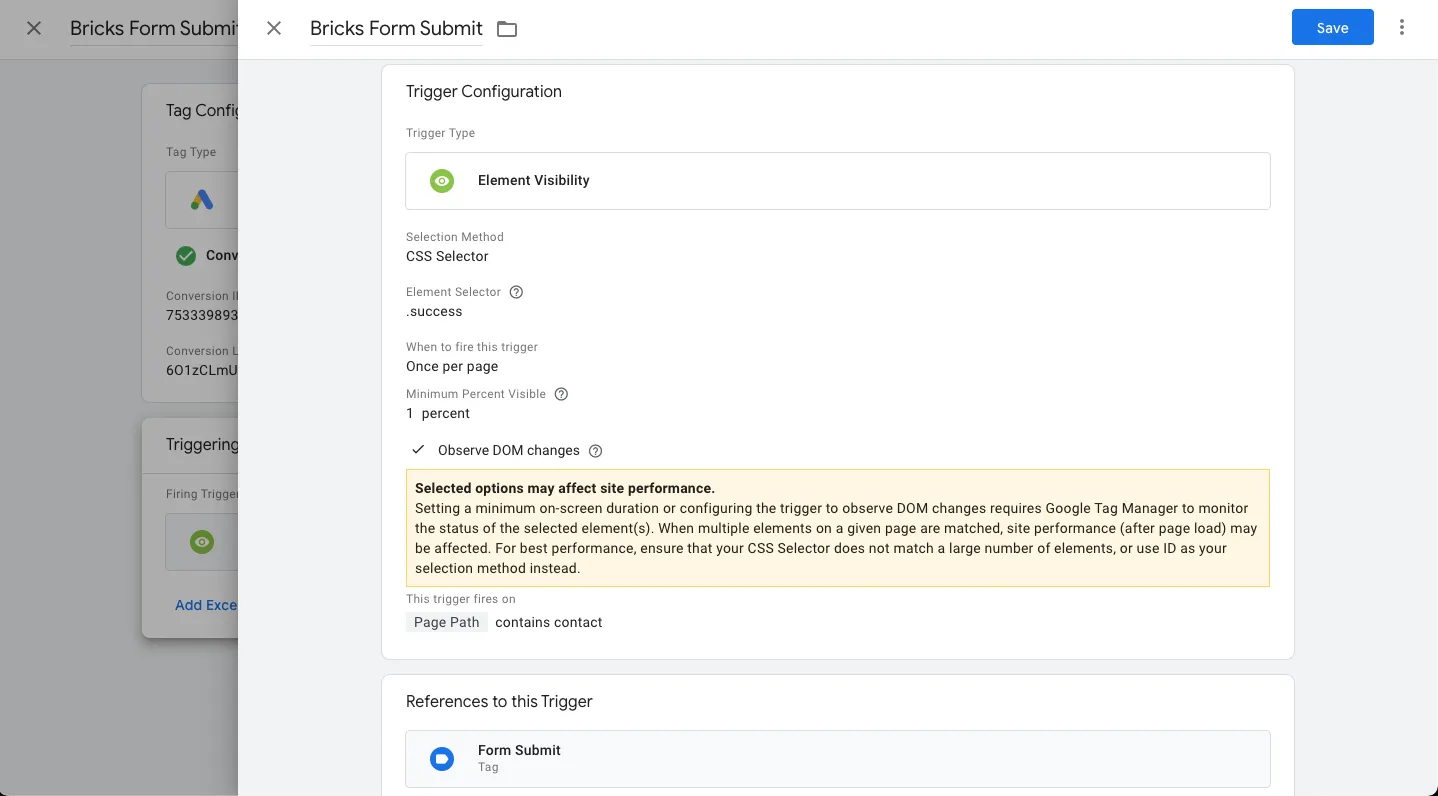
- Name the trigger Bricks Form Submit
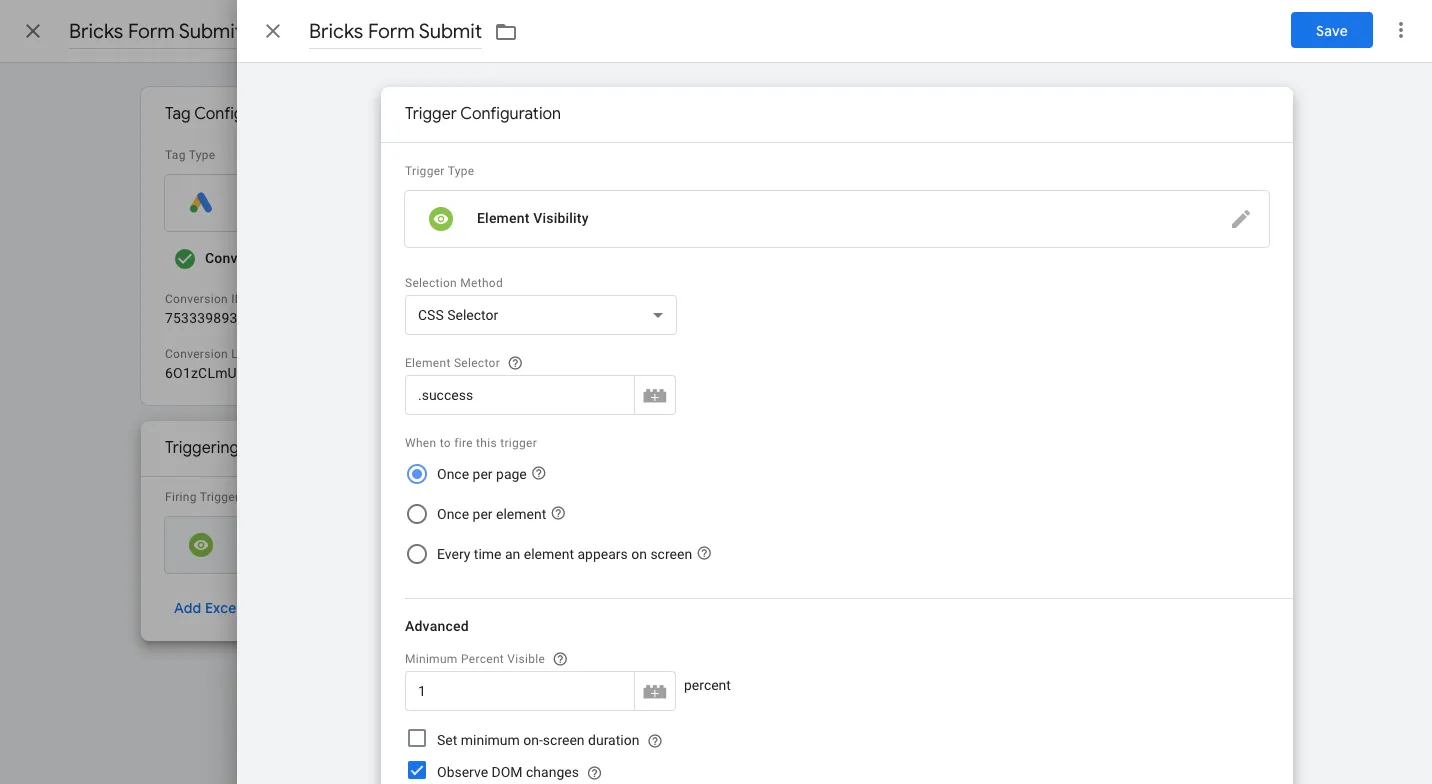
- Under > Selection Method > Choose CSS Selector
- Under > Element Selector > Enter > .success (include the period .)
- Under > When to fire this trigger > Select > Once per page
- Under > Advanced > Minimum Percent Visible > Select > 1
- Under > Element Selector > Enter > .success (include the period .)
- Tick Checkbox > Observe DOM changes
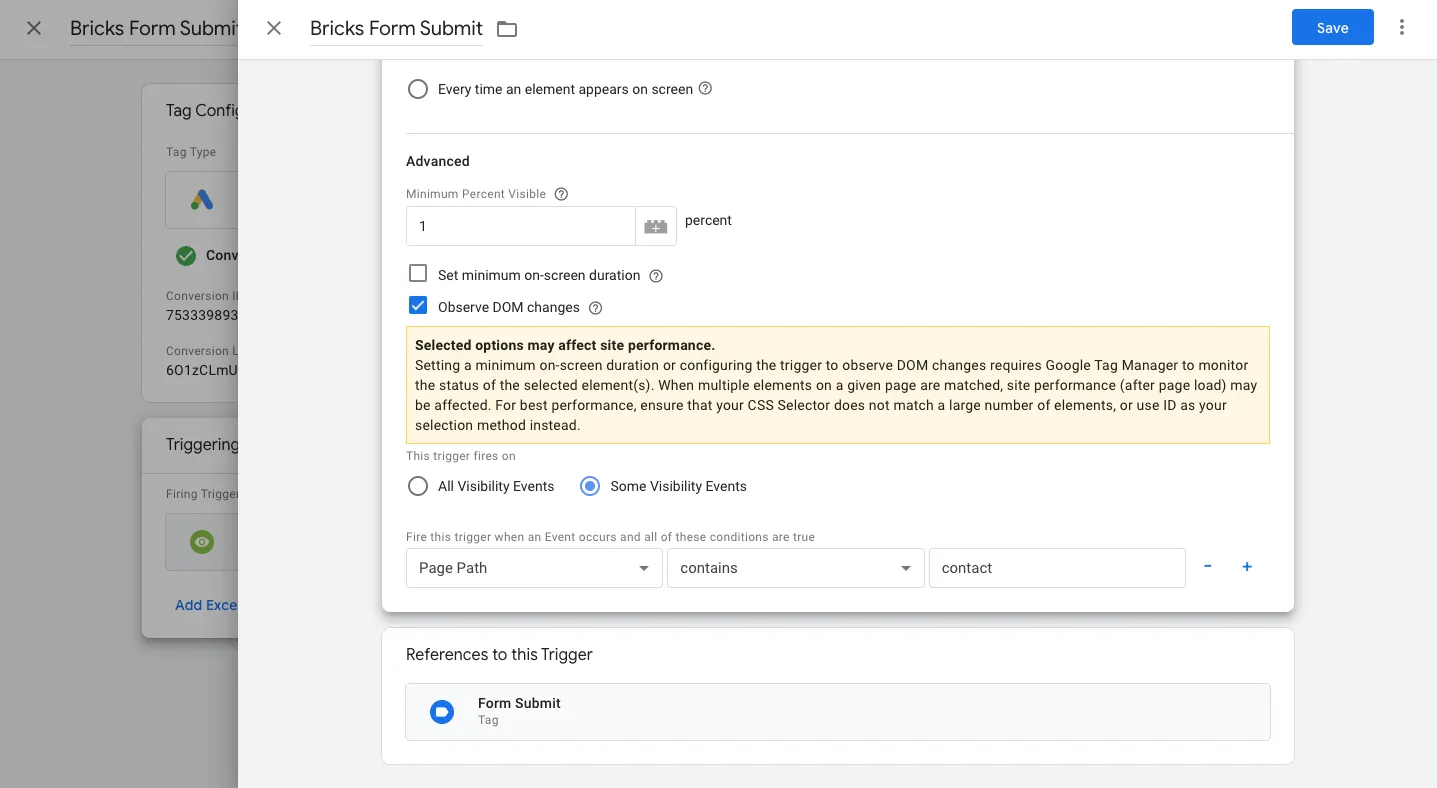
Optional > Can choose > This trigger fires on
- All Visibility Events (however not recommended as it will be slower)
- Prefer > Some Visibility Events
- Page Path > contains > contact (this is the name if the url page)
Click > Save to save all changes
Set up Tag > Bricks Website Phone Call

- Click on side column Tags > New
- Name the tag > Bricks Website Phone Call
- Under Tag Configuration > Tag Type > Google Ads Conversion Tracking
- Enter Conversion ID from Google Ads such as in step 9
- Enter Conversion Label from Google Ads such as in step 9
- In-depth view of configuration
- Click on panel > Triggering
- Click on + > To add a new trigger
- Choose trigger Type > Just Links
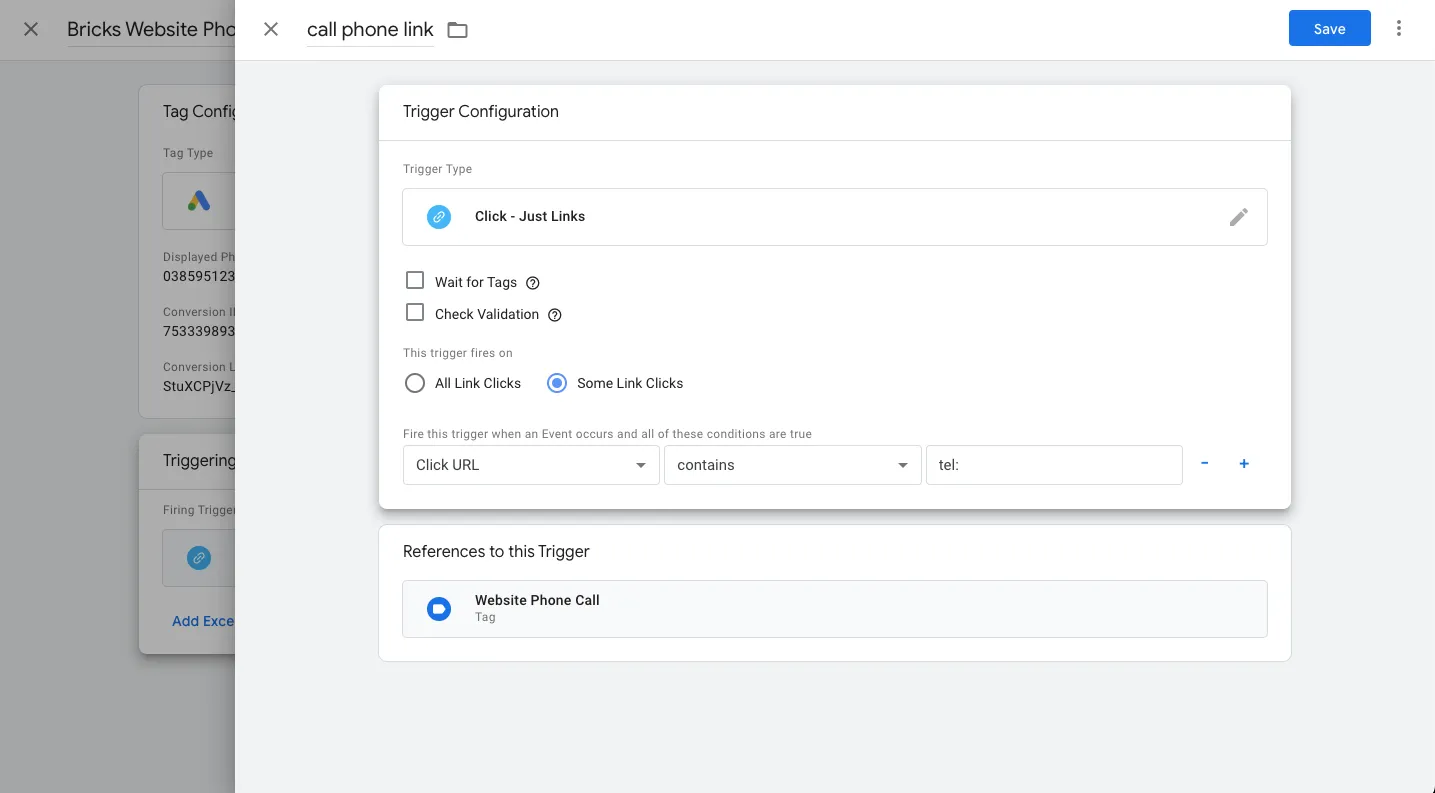
- Name the trigger > call phone link
- Select > Some Link Clicks
- Under > Fire this trigger when an Event occurs and all of these conditions are true
- Select > Click URL
- Select > Contains
- Enter > tel:
Click > Save to save all changes
Publish Changes
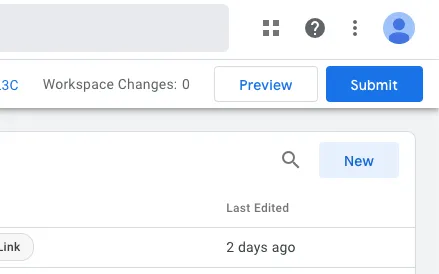
- Click on > Submit
- Click on > Publish
- Disable add blockers and test to confirm it all works
